SIMPLY CREATIVE: Green Eggs and Ham
St. Patrick's Day Breakfast
 |
| Green Eggs and Ham, our St. Patrick's Day Tradition |
I've never been one to really celebrate St. Patrick's Day. I'm not Irish, or Catholic, and San Diego is not one of those cities that makes a big fuss over all things green. That was until I had kids. Now, St. Patrick's Day is great fun and celebrated with enthusiasm at our house. My kids and husband do have Irish roots and so we have gone crazy with green. Back when my son was about four years old and a big fan of Dr. Seuss, we started the green eggs and ham tradition. We make green scrambled eggs by adding a drop of food coloring, and then built a breakfast sandwich with english muffins, white irish cheddar, green eggs, and ham. A few chocolate gold coins left behind by the leprechauns is always fun too. Then i read the story...it doesn't matter how old you are, it brings a smile to your face. This year, I'm sure rainbow sprinkled doughnuts will be added to the feast as well!
 |
| These two make me feel the Luck of the Irish everyday! |
SIMPLY CREATIVE: Body Salt Scrub Cubes with Coconut Oil
 |
| Individual size salt scrub cubes with coconut oil |
As I am sure you have been hearing, coconut oil is all the rage. I am a fan. I have been experimenting with making a body salt scrub for the shower. I started by haphazardly mixing together some warm coconut oil with salt and using it in the shower as an exfoliant and moisturizer. I was surprised at how much I liked it. The coconut oil then solidified, leaving me with a bowl full of the hardened mixture... but this gave me an idea. If I made up a batch and put it in an ice cube tray, I would have individual size portions ready for the bath/shower. One idea led to another, and before I knew it, these cute heart shaped salt scrub cubes were born. Did I mention that this is ridiculously easy? Keep it as simple as 2 ingredients in an ice tray, or go the extra step to add color and herbs. Either way, you will love these, I promise!
1 part coconut oil, liquified, barely warm
2 parts salt (I used plain table salt...but other salts or sugar could be used too)
(not too crumbly, not too soupy)

Optional:
drop of food coloring
crushed herbs
(I used a drop of purple and finely chopped fresh lavender)

Spoon your mixture into an ice cube tray. (I picked up the heart shaped ice tray at IKEA a while back, but a regular tray works fine). Allow oil to solidify in the refrigerator for a few minutes, then remove from the tray and keep in a jar. The oil will remain solid as long as it is kept in a cool spot.
Fun gift idea too!
SIMPLY CREATIVE: Sparkly Clean,
Fine Wine Dish Soap Dispenser
 |
| Fine Wine Dish Soap Dispensers |
Last week for Valentine's Day, I made up several of these for gifts for friends. It makes a clever thank you gift or hostess gift as well. Pair it with a cute dish towel to complete.
Steps:
1. Soak empty wine bottle in warm water for a few minutes and then scrape off the label. Take off the remaining glue with BarKeepers Friend, or other mild abrasive cleaner.
2. Re-label with a permanent label (many shipping labels are removable). This label is Martha Stewart brand found at Staples...permanent and water resistant, perfect for the kitchen.
3. Create a label. Before attaching, I opted to pencil on my design and go over it with Sharpie permanent markers, as the ink from my computer kept smearing.
4. Fill with dish soap. Or, fill with bath soap instead for the tub.
5. Cork the bottles using old corks. I then used sealing wax and a stamp over the top (optional).
6. Tie on a spout, like the kind used for olive oil or shot pourer.
SIMPLY CREATIVE: Valentine’s Day Celebration
I grew up in a home where we always celebrated Valentine’s day as a family. Both my parents always had a small gift and cards for us, as well as decorations and a special dinner. Our family still gets together for Valentine’s day. We gather together for a great meal; small gifts are exchanged, often something homemade. This year, the kids and I will be decorating valentine cards, and making heart-shaped pizzas as part of our celebration.
 |
| Sweet homemade valentines incorporating photos, kids art, handprints, etc. |
 |
| I like to display past valentines on branches, attached with wooden clothes pins |
SIMPLY CREATIVE: Chevron Stripe Buckets
 |
| Easy to make Chevron Striped Buckets |
Before the holidays, some friends and I decided to share homemade gifts for Christmas. It was a lovely idea, but the holidays got so busy, that we decided to postpone our gathering and gifts for a January New Year celebration. And by some wonderful twist of fate, we were blessed with a rare, warm, clear January day, and we sat outside eating brunch in short sleeves in 75 degree weather. Ahhh...
My gift to my friends was oranges, from the Carlson trees, in hand painted buckets. I keep a lookout for inexpensive containers, and had found these metal buckets a few months back. Primed, and painted with a chevron design, these containers made a splash.
HOW TO:
Supplies: Metal container, Spray primer for metal, low adhesive mask tape, acrylic craft paint, spray Varathane
1. Tape off the areas not to be painted. Spray metal with a metal primer spraypaint. (available at paint/ home improvement/ craft stores) Allow to dry completely.
2. Measure the base of your container and create a low, flat triangle template out of paper. Trace 4 times evenly around base, leaving 2+ inches in between each.
3. Lightly apply low adhesive (usually green in color) 1” tape along the triangles to create chevron stripes. Keep repeating to the top of the container.
4. Paint stripes in alternating colors between tape. Allow to dry completely.
5. Spray or coat with Varathane (water-based clear sealer available at paint/ home improvement stores)


SIMPLY CREATIVE: Wrap it up!
A few days left until Christmas and still so very much to do. You haven’t wrapped all of your gifts either? That makes me feel better. I have a few creative wrappings for you that are easy and fun.
I put together a gift basket, and tied it up with cellophane. I was transported to another place in time as I remembered growing up next door to a family that had 3 girls, two were the ages and grades of my sister and me. We were great friends and had worn a path between the shrubs that divided our houses. For a brief time, their mom ran a small business called “Wrap it Up!” She put together these wonderful baskets, chalked full of good stuff, tied up with cellophane, and ribbons turned into fantastic bows. I remember gazing at her organized work station, with spools of colorful ribbons, and rolls of cellophane, hung neatly on horizontal rods to efficiently wrap up her baskets. I wish they still lived next door to my parents...I would have run over and asked for Mrs. P’s advise. I miss them all, especially my friend Wendy, who lives far away now. We truly grew up together...a beautiful thing.

Before I run off into the deep forest of memory lane, I will show you a few fun wrapping ideas:
The Artist Wrap:

I quickly splattered white butcher paper with red and green craft paint, but a solid color works well too. Two colors of raffia were used to tie on an inexpensive paint brush ($1). The tag is a paint chip with a hole punched in the corner. Viola!
The Traveler/Adventurer Wrap:

Here, an old map makes a fun package. Red raffia ties on a magnifying glass. The patch was something I found at a funny vintage store in Michigan, but any tag will do.
The Bakers Wrap:

Use a dish towel, or cloth napkin to package your gift. Here, a loaf of my Swedish coffee bread is tied up with dish towel in a Scandinavian print...finished off with a cute little spatula. Use safety pins to secure the wrap.
A Gift for Grandma:

I had Genevieve paint a picture on butcher paper. Tied up with multi-colored yarn and a handprint tag...a grandparent’s delight.
Turn on some fun holiday tunes, and Wrap it Up!
12-12-12 (love that!)
SIMPLY CREATIVE: Advent Calendar
 |
| Fun Advent Calendar Ideas |
Is it possible that there are only 12 days left until Christmas? Don’t panic...at least that’s what I keep telling myself. I’m going to take a deep breath, drink an extra cup of coffee, sit for 5 minutes in front of the sparkly Christmas tree, think of the things I am grateful for...and then plot my day, strategically. I think I may need even more coffee.
I want to share my advent calendar with you. Advent is a season of anticipation. We anticipate the beautiful celebration of Christmas, the birth of Christ. Some advent calendars are pre-loaded with chocolates. The one I grew up with was a cute Scandinavian fabric calendar with 24 small pockets to hold little treats. As a little girl, I loved waking up to find what mom put in the pocket. I wanted to carry on the tradition with my kids, and got it in my head that I could and should make my own Advent calendar. How hard could it be, right? Well, it could be hard, long, and laborious, and indeed it was. I now call it the heirloom advent calendar, and I am expecting my children to pass it on for generations as the Christmas calendar that Great-Great Grandma Tina made. Just kidding (sort of). It is cute, and I am glad I made it, but it was a very time consuming project that I should have started in June. But I am getting side tracked because what I really want to share with you are ideas for the daily treats. The basics are a quarter, a piece of chocolate, gum, a candy cane, a small dollar bin item, etc. This works fine for my 2 year old, but slightly redundant for my 9 year old. And, there are 24 pockets...and I don’t want 24 more junk items in my house! This year I came up with experiential ideas. They are things we can do in this fun season, or a little break from the rules. It also helps me to slow down and do something fun with my kids, instead of frantically crossing off things on my TO DO list. I will share 12 with you, as we have 12 days left.
I roll up a little note and put it in the pocket, sometimes accompanied by a piece of candy:
- Your friend _______ is coming over for a play date after school.
- A bag of microwave popcorn with a note attached that says “Christmas movie tonight”
- Donut run on the way to school!
- 10 extra media minutes
- Hot chocolate packet with a note that says “with extra marshmallows!”
- A walk or drive to see Christmas lights after dark
- Let’s make cookies together after school
- Let’s do a craft together
- Surprise them with the news that they have been invited to a party, and it’s tonight
- A friend is coming over to spend the night
- A bottle of nail polish and a note, “Spa night at home with a pedicure”
- After school date with mom or dad to a favorite spot
These are the days of wonder. Soak it in.
SIMPLY CREATIVE: Thanksgiving Name Cards
11/13/12

Thanksgiving is such a wonderful holiday, and uniquely American. I experienced a homesick Thanksgiving in Germany, back in college. Our whole group was in a funk as we imagined our families gathering together, the smell of the turkey filling the house, mixed with that of pies and cider...
It is a great tradition to take a day to celebrate all that we have to be thankful for. We will be spending Thanksgiving week with my in-laws in Phoenix. I enjoy helping my mother-in-law take out her china and linens and decorating the table. This year, I thought it would be fun to make a simple place card at each spot with a fresh sprig from the garden with each name tied on. In addition, to be intentional about the reason for the holiday, I want to attach a question to each one: “What was your greatest blessing this year?” “What was the best event of the year?” “What are you hopeful for?” “What are you most thankful for?”...etc. Then, take turns around the table answering the question you were given. Initially, this can feel uncomfortable, or awkward, but in the end, we will all share a moment together, listening to one another around the table, instead of just small talk with Uncle Bob. While I am a really big fan of tradition, I also like to add a twist to the gathering, or a new addition to the menu. It keeps it fresh.
Blessings to you.

Supplies:
Card stock
Hole punch
Raffia
Garden Sprig
(Alphabet stamps optional)
Make the tags using a paper cutter and card stock about the size of a business card 2"x3"(if you don't have a paper cutter, measure and cut). Punch a hole at the top. On one side write the guest's name, on the back write a question to be answered around the table.
I stumbled upon this berry laden sprig on a shrub in the backyard. Any sprig will do as long as it doesn't have thorns. String the raffia or other ribbon through the hole and tie around the napkin and sprig.
Packaging Appeal
October 18, 2012
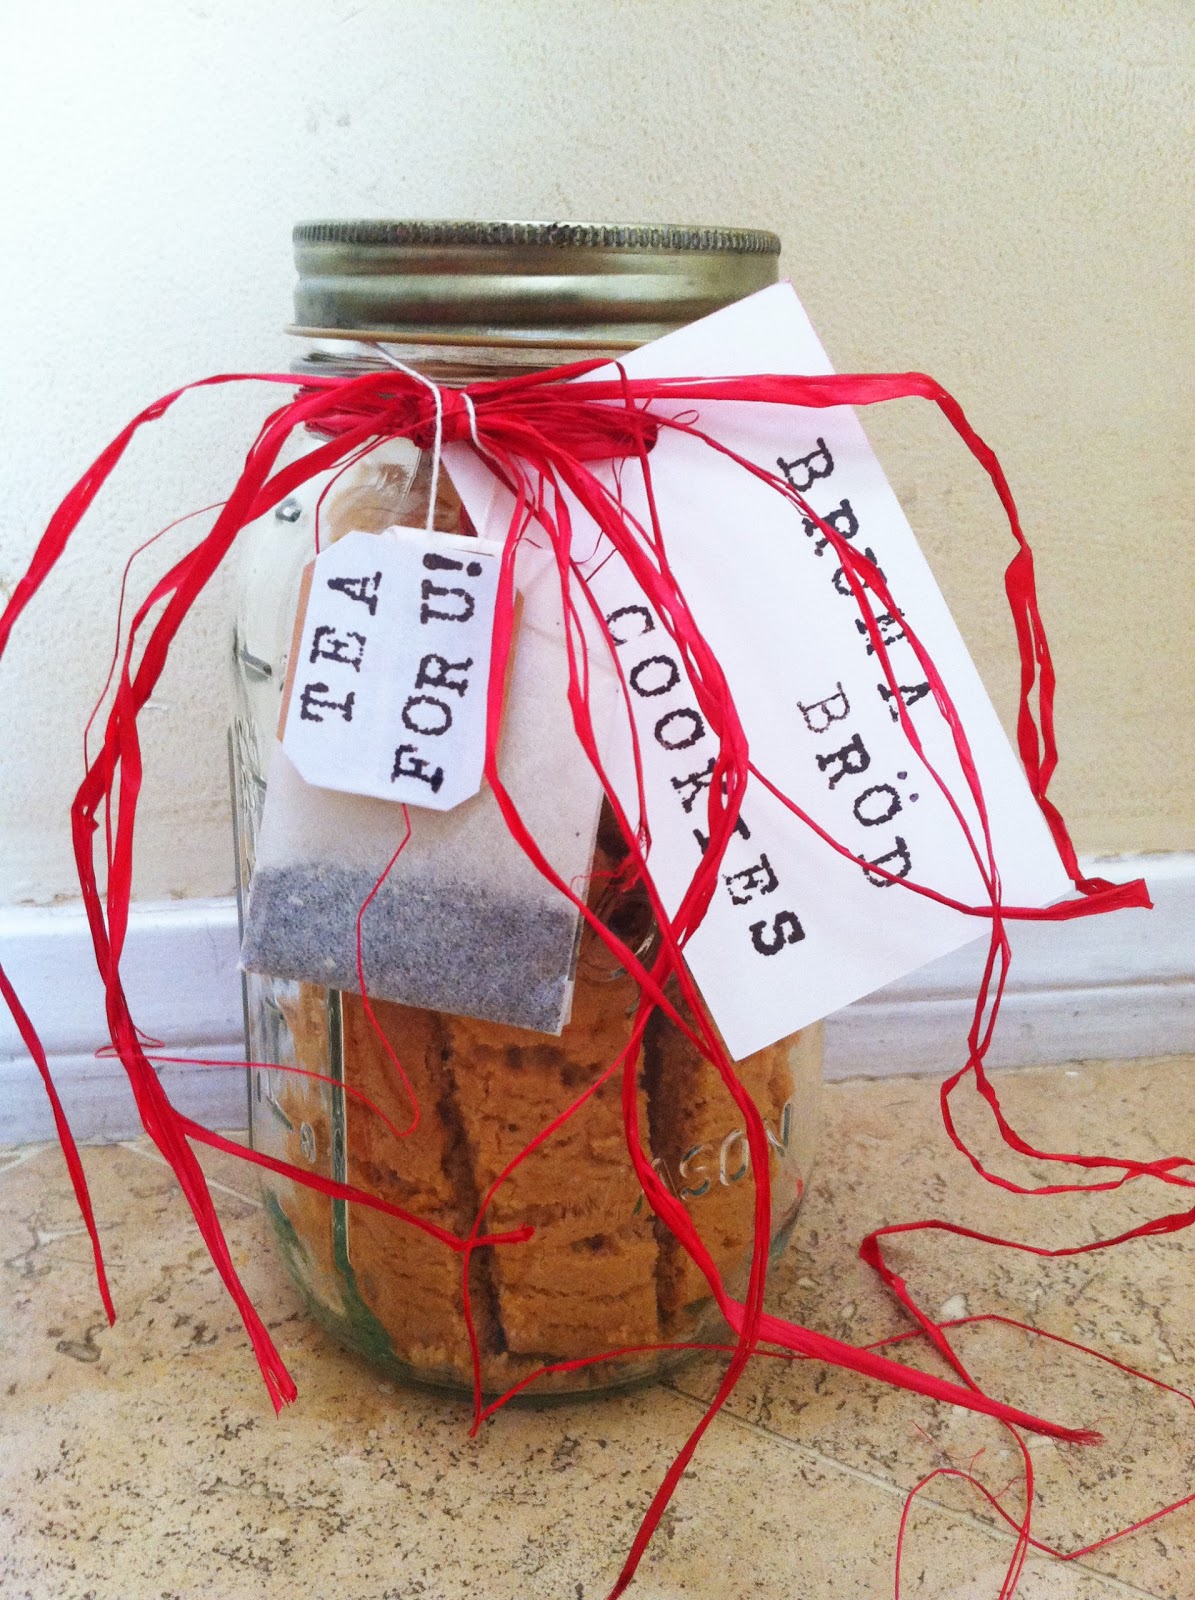 |
| Packaging appeal for homemade gifts |
Sometimes there is nothing better than a homemade gift. But it can be challenging to make the homemade gift look polished and clever. I placed the cookies I made yesterday into a canning jar, tied a hand stamped tag on with raffia, and added a personalized tea bag. Simple, inexpensive, homemade gift with packaging appeal!


Alphabet stamps, and ink pads, are available at craft stores, such as Michael's. They are a fun, easy way to add personalization to a gift. The personalized tea bag is a unique touch. I covered the existing tag with a blank address label and then stamped a message on both sides
Painted Pumpkin
October 3, 2012
 |
| Painted Pumpkin |
You can do this (even if you think you can't paint)! This took about half an hour and it was simple and fun. Here it is, step-by-step:
Materials:
large orange pumpkin
brown acrylic craft paint (about $1 at Michaels)
small round paint brush
 |
| Painted Pumpkin, step-by-step |
Start by painting brown at the stem and down the grooves for depth; soften the paint edges with your finger, or a rag.
Next, paint leaves along either side of one of the grooves. Darken that groove.
On the next flat space between grooves, make a center dot and then add petals around; fill the space from top to bottom with flowers.
Add dots between leaf and flower designs.
Repeat all the way around the pumpkin.

Note: this is meant for a pumpkin on a covered patio, or inside, as this is not paint that will hold up to the elements outside.
SIMPLY CREATIVE:
September 26, 2012
Bits of nature gathered during a walk in the woods were then glued onto a small wood frame with a hot glue gun:
 |
| "A Walk in the Woods" |
 |
| collected bits of nature |
A small painting was also conceived...
 |
| Woodland Finds, art by Tina C. Wells |
Wrap it Up!
September 19, 2012

Baby’s 1st Birthday, Favors
September 12, 2012

As I write this segment, it is hard to believe that one year ago today, my sister was in the hospital, and had been for a month. Twelve weeks before her due date she was put on hospital bedrest, with hopes she could stay there as long as possible before her November due date. Many women in this position only last a few days, but my persistent sister made it four weeks. There is a huge difference for a preemie born 8 weeks early, versus twelve. The short end of a long story is that tomorrow is Tori’s birthday, and you can’t even imagine that this beautiful, big, bubbly baby could have been a preemie at all. Her formal name is Victoria Grace, and she is indeed victorious through God’s grace.
 |
| Tori, the Belle of the Ball in her party dress |


Shell Frames
August 29, 2012

While painting at my friend Donna Hendrix' house, I noticed her beautiful arrangement of sea shells on her dining room table, as well as several photo frames and decorative boxes. She had made them! She told me they were quite simple and offered to give me a tutorial.


Aren't these beautiful? The white shells are best for a color photo, while the multicolored shells lend themselves to a sepia or black and white picture.
Donna's Tips:
*Choose a frame with adequate space for your shells, but not too big.
*Don't worry about covering every little edge of the frame. As you can see above, the frame edges show through.
*Experiment with different layouts. Once you have the basic, flat design, glue it down, and allow to dry.
*Next, add more layers of shells with glue, and dry. LOTS of shells look best.
*Use plenty of glue to ensure that your shells will be attached well, remembering that the glue dries clear.


A final thought...what a great project for the kiddos! My kids collect shells (and a variety of other things) all summer. It would be really fun to let them decorate their own frame with their collection and then place a fun summer picture inside.
Charming Gift Basket
(made easy and affordable)

Have you ever put together a gift basket? It always seems like a great idea, until I do it and realize I spent a fortune on a bunch of little stuff to fill it up, and the container itself was more expensive than I'd ever planned...and then I start to wonder why I didn't just buy one really nice gift instead. This summer I put together several gift baskets that worked out better than in the past. It all started at the Target dollar bins...I spied the above container for $2.50 and and decided to buy a few, at such a great price. I had several nice, but small items, soap, salve, a book, etc. Not enough to fill it up well. I picked up this flowering plant at Trader Joe's and put it in first. Next, I used my shredder to shred some coordinating colored sheets of construction paper for filler. I placed the plant first, then added newspaper on the bottom, then the shred on top of that. Lastly, I arranged the items. The plant added a great pop of color and height and filled the space without breaking the bank.


Another one I put together, I used the same concept, but added fruit from my tree and nuts along with the flowers and small gifts. The end result was a charming gift for a special person at a price that fit my budget.

Elegant Flowers
August 14, 2012

Recently, my friend's father passed away after living a long, beautiful life of 90+ years. I brought over some dinner and flowers. That particular week, I had the extra time to put together the flower arrangement myself. I am self taught in this area, which just goes to show that an amateur can do this! I picked up a beautiful bouquet of roses at Costco and went to work.

You will need:
Container, Oasis wet floral foam, Moss, Clippers, Flowers
(all of these items, minus the flowers, can be purchased inexpensively, at a craft store like Michaels)
I had this short, round, clear container from a previous arrangement. I have canna growing in my yard and the leaves are large and flexible to hide the oasis. If you don't have access to something like this, just use a container that is not clear. My first step was to put the canna leaves around the inside of the container (below). The next step is to cut the oasis to fit in your container and then soak it for a few minutes immersed entirely in water. Then, place the oasis in the container and cover the top with moss to keep it hidden (below). Lastly, I trimmed the roses one at a time, using the first discarded stem as my guide for the length of the others. I started by placing them in the center and worked my way out to the edges. The edge flowers I trimmed a little shorter. Viola!


By doing this myself, I easily saved $50- or more by not having to order from a florist. If you have never tried arranging flowers, this is really an easy project, and any type of flowers will work. When choosing a container, just be sure it is water tight. I often place a plastic container (like a discarded sour cream container) inside for the oasis if the outer container is not water proof. Once you have purchased the moss and the oasis and have them on hand, you are set to keep creating new arrangements. I encourage you to start experimenting!
Simple Flowers
August 8, 2012

A sweet friend gave me a beautiful bunch of flowers from the market. A big, bright, growers bunch- you know the type. I started to take them apart to cut and get them into a vase. As I worked, I decided to pull out multiple vases and display them by color. I have a collection of simple, clear, multi shaped vases. They are a fantastic thing to have in your cupboard because they can work with any decor, theme, style, etc. You can also mix in clear drinking glasses, or mason jars. I color coordinated the flowers into the various vases and used marbles in the bottom to help secure the stems. It was fun to watch the arrangement grow from a single vase bunch to an entire display. The bright jewel tone buds filled my room with the colors of summer! Happy.


No comments:
Post a Comment